


Yearning after the gorgeous breads that Safa Hemzé made at SFBI this winter using specialty flour starters, I decided to make a spelt miche. When I started rummaging in my flour chest however, I discovered we were all out of spelt but that we had a cache of whole kamut flour I had completely forgotten about. So I switched grains.
Kamut is actually a brand. The common name of the cereal is khorasan. But good luck with finding khorasan in the stores!
As the story goes, it was found in an Egyptian tomb by an American who shipped a few grains home to his father. The father sowed the grains and trademarked the name. Originally from Mesopotamia, kamut as we know it is organically grown in the United States. It is richer in protein and some minerals, especially selenium, than wheat but poorer in gluten. It is sometimes tolerated by people who can't have wheat, not however by people who have coeliac disease (according to Wikipedia).
I took a portion of my white starter (100% hydration), fed it twice with kamut and decided it was ready although it looked definitely less perky than when fed with wheat. But ready it was because even though I chose a long fermentation over the addition of instant yeast, it gave me a very satisfactory oven spring.
Oven spring isn't all there is to like about this bread, however. Safa is right, when you switch flours in the preferments, you do get amazing flavors. This bread has a complex and delicate taste. It is delicious just eaten on its own, especially because the crumb turned out silky and, while not wet, still not dry either, just what you want in a piece of bread when you don't necessarily intend to put butter or anything else on top. If I was given one word only to describe this crumb, I would say that it is voluptuous...
The dough mixed easily but wouldn't accept all of the 65% of water I had planned for it. It just wouldn't. So I didn't insist. I let it reach the desired consistency (low-medium gluten development), then ever so gently I added in most of the remaining water. I did it very slowly, so as not to drown the gluten and it was fun to see it gasp and sink and then swim back to the surface and ask for more. At one point though it clearly had enough and that was it...
I find doughs have a mind of their own and - most of the time - it's fun to look for it and discover it and then work with it.
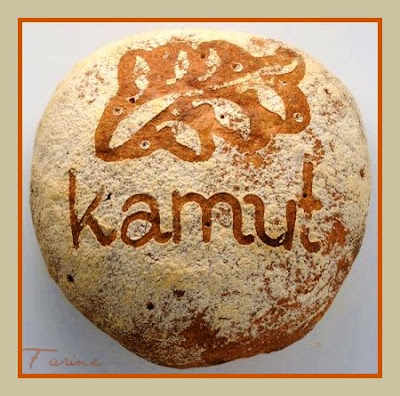
I had just read Joe Ortiz's chapter on stencils in The Village Baker and I decided to try his technique of piercing the surface of the dough in 8 or 10 differents points before stenciling, so that you don't need to score and still the bread won't implode. The bread definitely didn't implode, so it worked, but I don't care very much for the look of these holes. They make it seem as if I'd tried to make Swiss cheese, not bread. I didn't use an icepick as Ortiz recommends but a thin wooden skewer, the kind that's used for chicken satay. But an ice pick probably makes even larger holes, so I don't think that was the problem...
I also discovered that although it's fun to write with flour, a miche doesn't give a baker a lot of writing space. Kamut is fine, so would wheat and spelt be and rye would be even better, but forget about buckwheat or amaranth! So if miche-writing is your calling, be sure to pick your grain carefully...
 Ingredients:
Kamut is actually a brand. The common name of the cereal is khorasan. But good luck with finding khorasan in the stores!
As the story goes, it was found in an Egyptian tomb by an American who shipped a few grains home to his father. The father sowed the grains and trademarked the name. Originally from Mesopotamia, kamut as we know it is organically grown in the United States. It is richer in protein and some minerals, especially selenium, than wheat but poorer in gluten. It is sometimes tolerated by people who can't have wheat, not however by people who have coeliac disease (according to Wikipedia).
I took a portion of my white starter (100% hydration), fed it twice with kamut and decided it was ready although it looked definitely less perky than when fed with wheat. But ready it was because even though I chose a long fermentation over the addition of instant yeast, it gave me a very satisfactory oven spring.
Oven spring isn't all there is to like about this bread, however. Safa is right, when you switch flours in the preferments, you do get amazing flavors. This bread has a complex and delicate taste. It is delicious just eaten on its own, especially because the crumb turned out silky and, while not wet, still not dry either, just what you want in a piece of bread when you don't necessarily intend to put butter or anything else on top. If I was given one word only to describe this crumb, I would say that it is voluptuous...
The dough mixed easily but wouldn't accept all of the 65% of water I had planned for it. It just wouldn't. So I didn't insist. I let it reach the desired consistency (low-medium gluten development), then ever so gently I added in most of the remaining water. I did it very slowly, so as not to drown the gluten and it was fun to see it gasp and sink and then swim back to the surface and ask for more. At one point though it clearly had enough and that was it...
I find doughs have a mind of their own and - most of the time - it's fun to look for it and discover it and then work with it.
I had just read Joe Ortiz's chapter on stencils in The Village Baker and I decided to try his technique of piercing the surface of the dough in 8 or 10 differents points before stenciling, so that you don't need to score and still the bread won't implode. The bread definitely didn't implode, so it worked, but I don't care very much for the look of these holes. They make it seem as if I'd tried to make Swiss cheese, not bread. I didn't use an icepick as Ortiz recommends but a thin wooden skewer, the kind that's used for chicken satay. But an ice pick probably makes even larger holes, so I don't think that was the problem...
I also discovered that although it's fun to write with flour, a miche doesn't give a baker a lot of writing space. Kamut is fine, so would wheat and spelt be and rye would be even better, but forget about buckwheat or amaranth! So if miche-writing is your calling, be sure to pick your grain carefully...
- 476 g unbleached all-purpose flour
- 127 g white whole wheat flour
- 127 g kamut starter
- 32 g whole grain kamut flour
- 412 g water (I had 19 g left at the end of the mixing)
- 14 g salt
- 13 g olive oil
- Put the flours, the starter, the oil and 80% of the water in the bowl of the mixer
- Mix at low speed until incorporated
- Cover the bowl with a towel and let rest 20 to 30 minutes (autolyse)
- Add the salt and mix until the dough reaches low-medium consistency (when you wet your hands and pinch a piece of it, as you stretch and turn, you should start seeing a translucid membrane with some opaque spots)
- Start adding the remaining water very slowly until the dough can't take anymore
- Set the dough to ferment in a large covered lightly oiled bowl or dough bucket
- Give the dough a fold 30 minutes later, repeat after 30 minutes if the dough is still too slack
- Let the dough finish rising (it should have almost doubled. In my relatively cool kitchen 0 68F/20C, it took 7 hours altogether)
- Pre-shape the dough in a ball and let it rest 20 minutes, covered
- Shape it into a tight ball and let it proof for about 40 minutes on a flour-dusted parchment paper sheet set on a baking sheet
- Preheat the oven to 470 F/243 C with a baking stone in the middle and an empty shallow metal pan on a different oven shelf
- Pierce the loaf to a depth of about 1 inch (4 cm) in 8 or 10 different spots and stencil it if desired (one can also just dust the miche with flour and score it)
- Pour a cup of water in the prepared metal pan inside the oven (taking care to protect your hands and face) and slide the miche onto the baking stone
- Spray the oven walls with water and quickly close the oven door
- Lower the oven temperature to 450 F/232 C and bake for 30 to 40 minutes. The inside temperature of the loaf should be over 205 F/96 C.


Hi MC, what an interesting flour you used. I think I saw kamut flour in my local organic store too. The crumb looks delicious! What is the taste of this flour, all else being equal? Does it have a distintive taste of its own? Great Miche!
ReplyDeleteShiao-Ping
Looks wonderful, you're a real master!
ReplyDeleteVery beautiful bread.The kamut flour--something new for me.Very interestingiy.
ReplyDeleteAlla
I don't find the holes distracting and you did a beautiful job on the stenciling!
ReplyDeleteHow lovely and quirky! I love how you present this bread.
ReplyDeleteWonderful bread! My sourdough died during my half year abroad (Well, I dried it, and so far it didn't work to revitalize it...), so I'm not able to bake with sourdough again yet. But I'm a true addict, so I will just bake with yeast until my sourdough is ready again. so my question: How did you make this beautiful "painting" on top of the loaf? Do you describe the technique somewhere? I mean, I can guess how you made it, but I'm interested in knowing exactly how you made it... =)
ReplyDeleteThank you all for visiting! I am sorry I didn't reply sooner but my connection to the Internet while traveling has been very sporadic and not very reliable. I am back however and reading the comments. Salome, the "painting" is done with a stencil which I place over the loaf before dusting it with flour. That's done just before putting the bread in the oven. Nothing fancy as you see and endless possibilities for decoration...
ReplyDeleteGood evening, I'm writing to you to ask your permission to use your picture for a banner. It's for a contest in an italian blog about Kamut.
ReplyDeleteplease write me, if it is possible to eleocol@gmail.com
thanks