


I attended the Focus on Tarts workshop this weekend at the San Francisco Baking Institute and I loved it. I don't normally eat or even like sweets, so the tastings didn't transport me into taste-bud heaven as they occasionally do when the subject is bread, but we made some fantastic looking tarts and I am eager to try my hand at them again for family and friends, maybe starting with this lovely dessert for Valentine's Day.
The tart is made with a "pâte sucrée" (sweet dough) shell in which 20% of the flour has been replaced by cocoa powder (according to Juliette Lelchuk, our most knowledgeable instructor, it is best to use Dutch-processed). Once baked, the shell is filled first with salted caramel, then with chocolate cream ("crémeux") and finally with a glaze.
Juliette demonstrated the dry method of making caramel, which is faster than the wet one and somewhat less involved as you don't have to paint the side of the pan with water to keep the sugar from crystallizing. You do however have to be on standby and swirl the pot vigorously to help the melted and unmelted sugars combine more readily.
The pot is pretty sticky when you get done but it cleans easily if you put it back on the stove and boil some water in it.
The proportions are for 8 to 10 individual tarts and I leave it up to you to adjust them up or down for the number of tarts you actually want to make. Since many of the components will keep for a while refrigerated or frozen, my instinct would be to go for broke and plan for all 10 of them!
Method: (use a medium-size heavy skillet or saucepan with a broad surface area so that the sugar can spread and cook evenly. The pan needs to be large enough because the cream can splatter when added to the sugar. Don't use a dark pan or you won't be able to judge the color of the caramel)
Pâte sucrée (Sweet dough)
Ingredients:
140 g all-purpose flour
75 g powdered sugar
35 g cocoa powder (preferably Dutch-processed)
35 g almond meal (optional, makes the dough more tender, can be toasted for a different flavor)
80 g butter, cold
1 g salt
60 g egg yolks, cold from the refrigerator
Method:
- Sift the dry ingredients and place them in a food processor
- Cut the butter in small cubes and add to the dry ingredients, using brief pulses to mix until sandy
- Add the yolks and pulse again briefly just until the dough comes together
- Wrap the dough in plastic wrap after forming it into a ½-inch thick square and reserve in the refrigerator for a minimum of 4 hours but preferably overnight
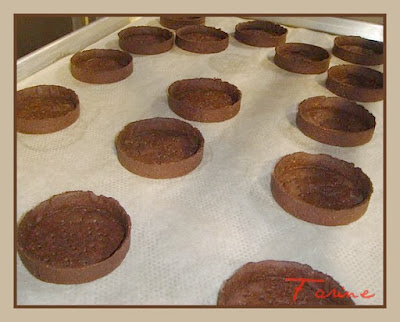
- Roll and divide the dough (it needs to be cold) without going too thin, especially as it is going to blind baked (i.e. baked without a filling), keeping in mind that for each 6" tart, you will need a 8" disk of dough
- Line each mold or circle by first centering the dough over it, then lifting up the sides of the dough and dropping it in. Don't create tension or the dough will shrink. Go in and down all the way around, making sure that the edges and the bottom are at a sharp angle, never stretching. If you see a thin spot, patch it up with a bit of extra dough
- Refrigerate for at least 30 minutes to minimize shrinkage during baking
- Trim the edges, keeping in mind that the dough always shrink a little bit, which means you must work at an angle. Use a small spatula and make a series of small swiping motions (not sawing) with its very edge, working from the inside of the tart towards the outside. If the dough is too soft to be trimmed easily, put it in the freezer for a few minutes before proceeding
- Dock and bake at 350 F/177 C for 15-30 minutes (depending on size and thickness)
- Once the shells are baked and cooled down, put them in the fridge or freezer till you are ready to use them.
Chocolate Crémeux
Ingredients:
255 g heavy cream
25 g sugar
115 g 60-65% dark chocolate, chopped (do not use a chocolate with less than 60% cocoa content or a milk chocolate or the crémeux will have too soft of a set and don't go higher either or it will be too bitter)
60 g egg yolks
Method:
- Bring cream to a boil (or at least a simmer) over medium heat
- Meanwhile whisk together the sugar and egg yolks without incorporating air
- Once the cream comes to a boil, pour 1/3 of it into the yolk mixture, whisking constantly. Whisk this mixture back into the pot.
- Reduce the heat to medium low and continue to cook, stirring constantly with a rubber spatula, to 180 F/82 C (don't go over that or you'll get scrambled eggs)
- Remove from the heat and immediately pour through a fine mesh strainer over the chocolate in a shallow bowl (just in case there are tiny bits of egg). Allow to stand for 1-2 minutes so the chocolate can fully soften (the bowl must rest on a trivet or a dry towel, especially if the counter is cold)
- Beginning in the center of the bowl, stir gently in one direction to create a stable, shiny emulsion

- Gradually stir in broader circles, to incorporate the cream at the edges of the bowl
- If using immediately, first cool (to 100-105 F/38 - 41 C) until slightly thickened . The crémeux can also be refrigerated (for up to 3 days) or frozen (for up to 2 months) and then gently rewarmed in the microwave or in a double boiler (you can also mix the whole thing with an immersion blender working from the center to the outer edges)
- Cover with saran wrap (directly on the cream) to avoid skin formation
Salted Caramel
Ingredients:
90 g sugar
45 g cream
30 g butter
3 g salt (I will use 2 g only on my next try as I found the caramel a bit too salty. If you try the recipe, let me know what you think)
2 g vanilla extract
- Heat the saucepan empty until pretty warm
- Meanwhile heat cream, butter and salt in the microwave (or in a small saucepan)
- When the pot is hot (with stove on medium), add a tiny amount of sugar. It will melt very fast. Add another tiny amount and shake the pan (but do not stir or the sugar might clump).It is okay to get a small amount of color at this point but if the sugar burns, it means the pot was too hot and you'll need to start over. Conversely if it doesn't melt, let it rest a while longer before adding more
- Continue adding sugar in small quantities and swirling the pan around
- When all the sugar has melted and there are no lumps, reduce heat to low and stir (even pull the pan off the heat for a few seconds but continue stirring), using a heat-resistant spatula

- When the caramel is a dark reddish brown and starts to smoke (be careful because it will quickly become bitter if you wait longer), add a very small amount of the cream mixture (about 20%), stirring pretty vigorously and taking care to avoid steam burn.

- Gradually add the rest of the cream, stirring constantly (the ideal is for the cream to be quite hot when you start adding it, however you must take care not to heat it up so much that it starts steaming and evaporating)

- Once the caramel-cream mixture off the heat, add the vanilla
- Let cool on a trivet. It is going to thicken up a bit (it keeps a few weeks at room temperature. To avoid its becoming a bit grainy, you can add some corn syrup).

Chocolate glaze
Ingredients
225 g dark chocolate (60-65% cocoa), chopped
78 g butter
78 g corn syrup (to make the glaze shiny and softer)
Assembling the tarts
- Gently melt the chocolate with the butter in the microwave or over a double boiler
- Stir in the corn syrup without incorporating air

- Use immediately or refrigerate and gently rewarm in the microwave or over a double boiler until fluid enough to pour (leftover glaze can be refrigerated for up to a month)
- Use a microplane to smooth the upper edge of the tart shell, holding it parallel to the edge (never towards the center as the shell might break) (this step is optional and mostly intended to make a more professional looking dessert)

- Once the shells are ready, spray oil on an ice-cream scoop and put one tablespoon of caramel in each shell (a tip from the pro: if you want the shell to stay crisp longer, paint the inside with melted chocolate before pouring the caramel in)

- Tilt the shell to cover the bottom (if it doesn't spread easily, use a small spatula)

- Put the shells in the freezer for 5 minutes so that the caramel gets firm
- When the caramel is firm, pour the 100-105 F crémeux over the caramel, leaving approximately 1/4 to 1/8" of space at the top for the glaze, leveling it out quickly as it will set fast

- Chill or freeze until firmly set, at least 1 hour (the tart may be stored frozen at this point for up to 3 days)
- Once set, pour over enough warm chocolate glaze to cover the surface and quickly tilt the tart(s) for even coverage
- Chill or freeze until glaze is set, at least 1 hour
- Garnish the tart(s) as desired: edible gold leaf, fleur de sel, chocolate shavings, puffed rice covered with chocolate or other garnishes. The tarts can be stored in the refrigerator for up to 3 days, well wrapped.


Mmm, I would'nt bake those tarts (much too complicated and long for me) but they look fantastic and delicious, and I would love eating one! Bravo!!
ReplyDelete"transport me into taste-bud heaven" what else can one say...wish I could have a taste....
ReplyDeleteJudd at Weekendloafer.com
@Flo, yes, these tarts do require a certain level of commitment but most of the ingredients can be made ahead of time and either refrigerated or frozen, which makes it less unrealistic to fit them in one's schedule.
ReplyDelete@Judd, the minute virtual-tasting technology becomes available, I'll put a tasting-booth on Farine!
This is food of Heaven! I would be glad if you give me one right now .
ReplyDeleteCheers,
@Mamatkamal, I wish I could!
ReplyDeleteHow do you convert grams into cups, tsp etc??
ReplyDeleteSorry, Anonymous, but I don't have a clue. Maybe you can find an online converter that will help you. Alternatively you may want to invest in a little kitchen scales that does both grams and ounces. Mine cost $25 but it has paid me back its weight in gold many times over.
ReplyDelete