Home About Recipes Artisans Blog Notes Resources
Showing posts with label Chestnuts. Show all posts

Tuesday, October 16, 2012

Giant Kabocha Scone

It all began with a word, potimarron, which is the common name in French for scarlet kabocha (also known as red kuri squash or orange hokkaido squash). That word may not look or sound like much to non-native French speakers, but to these French ears, it evokes two of childhood's cold weather pleasures, pumpkin (potiron) and chestnuts (marrons).
We didn't have jack-o'-lanterns (or potimarrons for that matter) in France when I was growing up but my grandfather grew huge potirons (Cinderella pumpkins) in his vegetable garden (my grandmother made sweet pumpkin soup every fall) and the fragrance of roasting chestnuts was ubiquitous in Paris in late fall and winter: as soon as I was old enough to go to my weekly piano lessons by myself, my mother would give me a few coins so I could buy myself a cornet de marrons chauds (a paper cone of hot chestnuts) when I exited the métro at Place de l'Étoile. I would stick the hot cone in my coat pocket and one of my hands would remain warm all the way down Avenue de Wagram where a bitter wind always chilled me to the bones.
I remember the chestnut man too. He was dressed all in black and wore a thick tweed cap with flaps that covered his ears. He rubbed his hands constantly and when he removed one of his knit gloves to rummage for change in the tin box where he kept his money, I could see that his fingertips were red. As I left clutching my cornet deep inside my coat pocket, I could hear him start calling again in a singsong: "Chauds, chauds, les marrons chauds..."(Hot chestnuts, hot chestnuts) and while I dearly loved my white-haired and soft-cheeked piano teacher, this scratchy little tune has remained alive in my memory when, sadly, her polkas, sonatas and mazurkas have long since sunk into oblivion.
So when I first heard (or read, I can't remember) the word potimarron and long before I had a chance to see or taste the actual squash, I was already under the spell. When I finally managed to get my hands on one of these bright beauties, the spell worked its magic and I fell in love.
Of course the kabocha is an easy squash to love. Since its skin is edible, while it does have to be washed, it doesn't have to be peeled. It can be sliced open, seeded, then steamed or roasted. It can also be cut into chunks and added to a soup where it boils happily with other vegetables. It cooks rather fast in fact. Its flesh is both creamy and dry and does taste a lot like buttery chestnuts. It is also choke-full of vitamins, fiber and oligo-elements.
For all these reasons, when I saw a potimarron cookbook in a bookstore in Paris last March, I couldn't resist, all the more because its author was Cléa, a French blogger I greatly admire for her imaginative and flavorful cuisine. We now live in a part of the country where kabochas are commonly grown (among many other beautiful and tasty winter squashes) and having so many creative kabocha recipes at my disposal means we can take full advantage of this local crop without ever feeling bored or tired.
Witness the giant scone breadsong  and I made for breakfast a couple of days ago. She was in town for a BBGA-sponsored baking class which I also attended and she stayed over at our house. I did the mixing and breadsong kindly did the shaping, giving me a personal demo of her scone hand-"laminating" technique (she normally shapes the dough in a rectangle but it is easy enough to reshape it in a circle once the "laminating" is done).
It was indeed a learning experience to see breadsong at work: seemingly heeding secret orders, the dough shaped up for her in a way it may never have for me. I had thought it was really dry and would require the addition of buttermilk or yogurt but breadsong said, no, it would come together as it was and she was absolutely right, it did. Sheer mastery! Thank you, breadsong, I will always trust crumbly scone dough from now on and also, always, always, "laminate"as it does indeed make for a much airier texture. My heartfelt thanks to you too, Cléa, for being a fellow kabocha lover and for sharing your many ways of enjoying this magnificent squash! 

Ingredients:
  • 125 g cooked kabocha puree (I steamed big chunks of the unpeeled kabocha, then ran the cooked squash through the foodmill. I tried using the food processor but it wouldn't work: I would have had to add some liquid, which I didn't want to do)
  • 20 g olive oil
  • 50 g fresh goat cheese, crumbled (Cléa used fresh sheep's milk cheese but I didn't have any)
  • 1 egg
  • 100 g emmer flour (I milled emmer berries I had on hand. If you don't have access to emmer, you may want to replace it with all-purpose flour or white whole wheat flour or equal parts of all-purpose and regular whole wheat flour)
  • 150 g oat flour (Cléa uses corn flour but I didn't have any)
  • 10 g baking powder
  • 6 g sel
  • 25 g dried apricots, chopped
  • 25 g hard sheep's milk cheese, grated (I used a Basque cheese but I suspect Manchego would work fine too and it may be easier to find)
Method:
  1. Pre-heat the oven to 350°F/180°C
  2. In a big bowl, mix together the kabocha puree, the oil, the goat cheese and the egg until mostly incorporated (I used a fork)
  3. Add the apricots and the hard cheese
  4. Transfer to a work surface and quickly work the dough into an 8-inch circle (it will look impossibly crumbly at first)
  5. Cut in six with a dough cutter without detaching the slices
  6. Bake for 30 minutes
  7. Enjoy warm or cold (it will keep well for a few days in a ziploc bag).
The Giant Kabocha Scone goes to Susan for Yeastspotting.

Sunday, December 12, 2010

Meet Solange Couve, Artisan Jam-Maker

Related post: Pear-Chestnut Confit
I don't often write about non-bread magic but I must share with you this visit to Solange Couve, jam-maker extraordinaire who lives with her husband Stéphane (whom we didn't get to meet as he was away visiting his mother), her dog Victor and her two cats, Lulu and Lily, in a remote corner of the Ardèche department in south-central France. From the highway it takes about 45 minutes and hundreds of steep curves on very narrow roads (we were glad to be traveling on a holiday when traffic was sparse) to reach the farm.
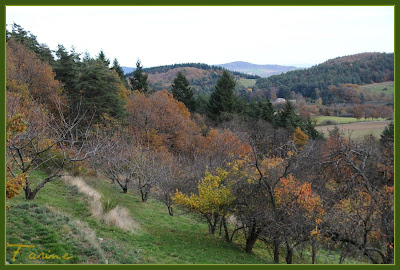
New vistas opened up with each turn in the road and if it had been possible to stop more often (alas, opportunities to just get off the road and admire the landscape were few and far between), I could have taken dozens of pictures, all different. It's easy to understand why so many of my French friends rave about vacationing in the Ardèche backcountry.
Like Emerald City in the Wizard of Oz, the farm is literally located at the end of the road.
The farmhouse has remained pretty much as it was when Solange and her husband decided to make it their permanent home 27 years ago. The sink has remained the same, the doors and walls were repainted in their original colors and the volumes were not altered.
Solange and Stéphane happened upon the farm one day while traveling in the area and fell in love with it at first sight. It then belonged to two elderly sisters who, as it turned out, were only too glad to sell and move away. The surrounding land had been left idle for 20 years although some of it was being farmed by neighbors. The couple led a busy life in Paris where Stéphane was a dentist with a thriving practice and Solange, who was a real estate agent, spent her week commuting from the capital to central France and to Corsica. In other words, they mostly saw their new house as a destination point for downtime.
After a few years however the pull of the farm became too strong to resist. Stéphane sold his practice and bought a new one in the Rhone valley, about 45 minutes away. As for Solange, she decided to forego real estate and to become a farmer. Now for that dream to become reality, two things needed to happen: the land had to be cleared up (a process which involved an enormous amount of manual labor) and Solange needed to acquire notions of agriculture. Not a woman to be easily deterred, she enrolled in an agricultural studies program in Valence and spent a year learning everything there was to know about trees: how to plant and prune them, how to take care of them, etc. When that was done, she spent another year learning about food-processing to find out all she could about sugar chemistry. An overkill, she soon realized, for someone whose only aspiration was to learn how to make jam properly. But Solange is nothing if not thorough and she forged ahead.
Meanwhile the land had been cleared and planted with close to 4 acres of fruit-trees. Since the Ardèche is raspberry-heaven, Solange also planted 2.5 acres of raspberry bushes as well as red and black currant bushes. For the first 10 years, she produced on average 6 tons of raspberries a year and sold them fresh to the local cooperative. Then the raspberry bushes were hit by some illness and had to be ripped out. She decided to diversify.
Using no other ingredients than fruit (pears, apricots, peaches, quinces, berries, etc.) from her land and sugar, she started producing more than 5 tons of jam a year which she sold mostly to luxury hotels and restaurants and to high-end grocery stores and bakeries as well as to fruit and vegetable markets which offer a small artisanal product section.
Since she had kept the chestnut-trees (the Ardèche is famous for its chestnuts) which were on the property when they bought it, she embarked on a trial-and-error learning process which taught her how to turn her chestnuts into delicious marrons glacés (candied chestnuts), crème de marrons (chestnut spread) and purée de marrons (chestnut purée). She also learned how to make pear-chestnut confit, an exquisite concoction which can be served with a brioche as a light dessert at the end of a holiday meal or poured over fromage blanc (soft curd cheese). As soon as she mentioned it over the phone, I knew I wanted to learn how to make it and report on it on the blog (after all, it could tempt you to make a brioche to go with it!).
Today Solange is semi-retired. She has kept her workshop (located about 2 miles away from the farm) but she only works for a few luxury hotels and restaurants on the Côte d'Azur and in the Alps as well as for family and friends. She still makes marrons glacés and other chestnut delicacies, including the confit, but she no longer sells them (too much work). I wish I could describe in details the lunch and dinner ardéchois she prepared for us and the extraordinary breakfast that awaited us in the morning featuring grape juice from her own grapes, no less (they grow on the vine that shades the big table just outside the kitchen door), but it would be off subject. Suffice it to say that Solange loves to cook and that her imagination is bottomless when it comes to extracting as much flavor as possible from the fruit and vegetables she grows on her land. We were awed!

Pear-Chestnut Confit

Related story: Meet Solange Couve, Artisan Jam-Maker
Chestnuts are abundant in the Ardèche where they are used in a variety of dishes, some sweet and some savory, and even in bread. To make this confit, Solange uses chestnuts from her own chestnut-trees.
She also uses pears from her orchard (she only grows Williams pears). The ones she uses in this particular dish are the last of the season and she has saved them for the demo. 2010 hasn't been a great year for pears: last year the pear-trees yielded a huge crop of very big pears but this year, they struggled to produce fewer and much smaller fruit. Still the pears seem marvelously fragrant and juicy to me.
For this recipe, the pears are first peeled...
... then cooked in syrup until they become translucent.
As for the chestnuts, they are cut horizontally in a circle, then boiled briefly to slightly loosen their two layers of skin. Once peeled, they are cooked in boiling water before being added to the pears. Preserved chestnuts in syrup can also be used, whether home-made or store-bought.
Solange uses a special knife to cut through the chestnuts but as demonstrated in the video below, a regular paring knife can also be used.Previously, when she was processing her chestnuts for commercial purposes, she had them peeled in the village by an artisan who uses a less labor-intensive technique: he places the chestnuts inside a rotating cylinder perforated with many small holes and uses a flame-thrower. The flames lick the outside of the cylinder, burning away most of the skins. The chestnuts are next dipped in water then placed on a rolling mat where the remaining skins are removed by hand. The perfect ones can be used whenever a recipe calls for whole chestnuts whereas the other ones are puréed and used in other recipes.
Solange says that it is best to let fresh chestnuts dry out a little as they are easier to peel if they have shrunk a little. Store-bought ones are usually somewhat dry already, so this step can be skipped. Since the skins are easier to remove when the chestnuts are hot, it is almost guaranteed to be a challenging exercise and caution is de rigueur. If one isn't really partial to burned fingers, it is best to use chestnuts preserved in syrup as a less hazardous alternative.
Ingredients:
1 liter of water
400 g crystallized sugar
10 pears
10 big fat chestnuts (or their equivalent in broken pieces)
1 vanilla bean (from Tahiti if available)
Method:
  1. Peel and cook the chestnuts as described above. Solange cautions that the chestnuts need to be peeled while still hot as their skin starts to stick again when they cool down.
  2. Heat water in a medium-size wide and shallow pot (to facilitate evaporation) and add the sugar
  3. Slice open the vanilla bean and scrape the tiny grains into the syrup, then add the two halves of the vanilla bean to the pan
  4. While the syrup is boiling, peel and core the pears and cut them in quarters
  5. Plunge them delicately into the boiling syrup and let them simmer. Refrain from handling them as they cook. To avoid breaking them, do not flip them over
  6. When the pears are translucent, gently add the chestnuts with some of their cooking water and let the syrup thicken again
  7. Pour into jars when done. The confit will keep for a couple of weeks in the fridge. To extend its shelf life, it is imperative to sterilize the jars, a precaution that Solange takes systematically. She places all her jars in a big pot, covers them with cold water, then bring the water to a boil and lets the whole thing boil at 176°F/89°C for 15 minutes. None of her jars has ever spoiled.
Unfortunately my version of iMovie doesn't allow me to add subtitles or I would have done so. But I can at least tell you what Solange is saying in this video clip (and please excuse my use of the French word "translucide" for "translucent" in the spoken dialogue. After two weeks of complete French immersion, I clearly had a hard time switching my aging neurones to English!).
  • When adding the pears to the syrup, make sure they are completely immersed and let them simmer
  • When preparing the chestnuts for peeling, cut through both skins all around. It is a bit hard to do but but when cut that way, both skins loosen simultaneously in boiling water.
  • Using a chestnut knife makes cutting the chestnuts in a circle a bit easier but a regular paring knife can be used as well
  • It doesn't matter if the cut penetrates the flesh of the chestnut
  • After peeling, the chestnuts need to be cooked before they can be added to the pears
  • Add some of the chestnut cooking water to the syrup in the pear pan, so that it can thicken again without caramelizing
  • It doesn't matter if the chestnuts crumble when added to the pears. In fact if using preserved chestnuts you probably want to break them a bit at this point.

Wednesday, December 2, 2009

Chestnut Flour Bread

This chestnut bread is the first recipe I make from the book Crust by Richard Bertinet. I have had the book for close to a year, I have looked at the gorgeous photos quite a few times but I have never watched the DVD that comes with it and never baked from the recipes. What turned me off, I think, is that the bread that "talked" to me the most was the one he made with Cabernet grape flour. I was longing for this incredible purple crumb and imagining the taste but, first of all, when I checked, the flour was out of stock and then, when it was back in stock, it was so expensive (and shipping was extra) that it just wasn't worth it. I must have been sulking because I didn't open the book anymore. But last time I was in Paris visiting my mother (she lives 5 minutes away from a fantastic health food store), I bought some organic chestnut flour and I remembered it when I saw Trader Joe's vacuum-packed steamed chestnuts the other day. I don't know about you but if there is one thing I won't do is cook and peel a large number of chestnuts. In my youth, whenever my mom made her signature chestnut milk soup - so delicious! - we had to prepare everything from scratch and I figure I have enough hours of chestnut peeling behind me to last me a lifetime (the white skin inside is the worst!). No more, thank you! So Trader Joe's to the rescue, as usual! Armed with chestnut flour and steamed chestnuts, I started looking through my books for a recipe and Crust practically jumped at me from the shelf. I guess time-out was over, I was done sulking and ready for something new. So here it is. Bertinet's chestnut flour bread! One dough, four shapes and a lot of fun!
Here are the four shapes that Bertinet suggests. His loaves are beautiful but I wanted something a bit more holiday-ish (I won't have much time to bake before Xmas as I'll be barely be back from visiting my mom), so I tried different things. The "chestnut" one was "de rigueur" to go with tiny tots (we have plenty of those) and Santa (which we have too as one of our menfolk is always called upon to put on the costume, the beard and the hat and to ring the doorbell, whereupon the tiny tots usually start running for cover, unless this year they finally figure out that Santa sounds strangely familiar, even if they can't see his face too well behind all this white hair).
Anyway I also wanted to make a loaf that looked like a chestnut. I don't think I really succeeded. First of all, the scoring opened up much more than I thought it would, then the shape isn't quite right but who will notice? (I used molasses to get the glazed look in case you are wondering. My family loves molasses, so I won't get any complaints but if you want to make the bread and don't like molasses, you may want to start thinking of alternative glaze).
I made the hedgehog shape because I find irresistible! I've always loved hedgehogs and not only because of Beatrix Potter...
And finally I made a Christmas carol loaf. I had cut out paper stars which I stuck on the loaf before dusting the whole thing with flour but they disappeared during the baking, swallowed up by the huge chiasms that opened up wherever I had scored. Since it was my first time ever baking chestnut bread, besides playing with the shapes, I pretty much followed the recipe (except that I used my mixer and Bertinet does it by hand). The only real thing I changed is that I made the pâte fermentée (basically "old dough") with liquid starter instead of commercial yeast. That's it. Everything else is the same, down to the last gram of water. I wasn't really too sure what to expect, water-wise, since I don't know whether or not the recipes in the book sold in the US had been re-tested with American flours (somehow I doubt it) and I know nothing about British flours. So I reserved a fair amount of the water (more like 15% than my usual 10%) but I ended up putting it all back in. The chestnut flour sold here (I know Whole Foods carries one from Italy) may absorb more or less water than the one I brought back from France. So exercise caution with the water amount. It is always a good idea anyway. Because of the pâte fermentée, this bread is made over two days.

Ingredients (for 4 small loaves)

For the prefermented dough
  • 175 g mature white starter
  • 494 g unbleached all-purpose flour
  • 258 g water
  • 26 g raw wheat germ
  • 12 g salt 
For the final dough
  • 750 g unbleached all-purpose flour
  • 400 g chestnut flour
  • 700 g water
  • 450 g fermented white dough (for a possible use of the surplus fermented dough, click here)
  • 5 g instant dry yeast (Bertinet uses 15 g fresh yeast but I didn't have any)
  • 25 g salt
  • 200 g whole, peeled vacuum-packed cooked chestnuts, crumbled into chunks 
Method

For the fermented dough
  1. Mix flour, water and white starter until the flour is well hydrated, cover with a cloth and let rest 20 minutes
  2. Add salt and mix until you get a gluten window (when you stretch some of the dough really thin, you see strands of gluten and almost-see through spots)
  3. Put in an oiled bowl and cover tightly
  4. Let rise at room temperature for about two hours, then put in the fridge for up to 48 hours
  5. Remove from the fridge at least two hours before using
For the final dough
  1. Combine the flours in the bowl of the mixer, add the water and mix well. Cover with a cloth and let rest for 30 minutes
  2. Add the fermented dough and yeast and mix until the dough is smooth and elastic
  3. Sprinkle the salt over it and mix some more (the dough is really supernice to work with and very fragrant)
  4. Very lightly flour your work surface. Place your dough on it, rough-side up, and flatten it out with your fingers
  5. Spread the chestnut pieces over the top and press them well into the dough
  6. Fold a few times so that all the chestnuts are incorporated into the dough
  7. Form the dough into a ball, put it into an oiled bowl, cover with a cloth and let it rest for 40 minutes
  8. Lightly flour your work surface again, and turn the dough out on it
  9. Fold the dough (on all four sides), then put back into your bowl, cover with baking cloth and let it rest for another 20 minutes
  10. Lightly flour your work surface again, turn out the dough and divide it into 4x630 g pieces
  11. Shape as desired (I made two boules and two batards)
  12. Place on a semolina dusted parchment paper over a sheetpan
  13. Let rise, covered with baking cloths, for 1 ½ hour or until just doubled in volume (mine didn't quite double) (my oven is too small to bake 4 loaves at a time, so I let 2 of them proof in the basement where it is much cooler, so that I could stagger the baking)
  14. Meanwhile turn on the oven to 500ºF/250ºC with a baking stone in it and an empty cast iron (or metal) pan on the bottom shelf
  15. When ready to bake, score the breads the way you like, pour 1 cup of water in the cast iron (or metal) pan and slide the breads (still on their parchment paper) onto the baking stone, spray some water into the oven and close the door quickly
  16. After 5 minutes, turn the oven down to 440ºF/220ºC and bake for another 20 minutes
  17. Check to see if the loaves need to be turned around or if they need to switch places, then bake for another 10 minutes as needed
  18. Let cool on a rack.
Bertinet doesn't provide a picture of his crumb, so I can't compare. Here is the crumb I got, not that great but not too bad either, considering that the bread contains a high percentage of chestnut flour. The taste is unusual and very delicate. I like it a lot...

These Chestnut Flour Breads go to Susan, from Wild Yeast, for Yeastpotting.


Blog Designed by: Deanna @ Design Chicky