Home About Recipes Artisans Blog Notes Resources
Showing posts with label Valentine's Day. Show all posts

Monday, February 9, 2015

About love

Love is when an eight-year old French girl decides to make a Pithiviers (an almond cake) for her family. She has baked Pithiviers before and is confident it will come out well. So confident that she forgets to use flour. Butter goes in and ground almonds and sugar and who can remember what else but what comes out of the oven is a flat disk. At the end of dinner that night, the so-called Pithiviers is solemnly brought out and sliced. But the smell and taste are off-putting (mushroomy in fact, probably because of the baking powder) and nobody is actually able to eat more than one bite of his or her share except the little girl's dad who pronounces the sorry cake the best flourless Pithiviers he has ever had.
Love is when you bake a brioche for your Valentine and you make it a hundred percent whole wheat to compensate for all the butter you used that he shouldn't be eating and you bungle the shaping because really you never learned how to make a brioche à tête like the ones you see all over Paris and because of the poor shaping, it doesn't rise as well as it should but you bake it anyway and when you slice it open to reveal a somewhat under-baked center, your Valentine says there is nothing wrong with your brioche that a little browning in the toaster won't fix.
Love is a lot like gluten in bread dough: it binds us together, yet leaves enough breathing space around each of us that we can grow and change and still be part of a whole. In the face of the relentless waves of violence, ugliness, intolerance, and plain old stupidity that are threatening to sweep us under, the humble metaphor is reason enough to keep on baking.
Happy Valentine's Day everyone!


Thursday, February 13, 2014

About love

One thing I know about love is that it is good at preserving footprints. Unlike the sea which washes them away with each rising tide and better than concrete which only freezes Time...
...love etches moving footprints out of joy and sorrow, creating enduring paths in a random world. On this Valentine's Day 2014, let us celebrate all the ones we love. Whether or not they are still with us, we walk with them every day of our lives.

Friday, February 7, 2014

Chocolate Ciabatta with Dried Cherries and Roasted Hazelnuts


Related post: All About Ciabatta: notes from a class

Okay, so with Valentine's Day in mind, I test-baked a version of this festive ciabatta (inspired by the Breakfast Ciabatta with chocolate pieces and bits of candied orange that Didier Rosada demoed during the All about Ciabatta class). The chocolate and cherries combo is one of the Man's favorites and when you add roasted hazelnuts to the mix, well, you'd think he had died and gone to heaven from the blissful look on his face. Since ciabatta has become one of my favorite breads to make, I thought it would be just perfect for the occasion.
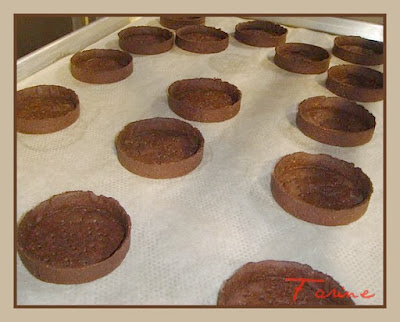
But I needed a test run because I wasn't sure of the percentage of cherries and hazelnuts to use. Good thing I did because, as it turned out, I didn't put in nearly enough of either that first time. Also I had been so concerned that the ciabattas might stick to the couche when proofing that I had used way too much flour (as can be seen from image below) and they came out looking more like rustic Yule logs than Valentine Day treats!
I had made four ciabattas. I brushed one of them clear of flour, which made it less Christmassy but gave it the sorry look of a legless and jaundiced platypus (minus the tail and the bill but you know what I mean)...
Nevertheless I resolutely sliced into it...
...and was rewarded by a wonderful fragrance of poolish, chocolate and roasted hazelnuts. I couldn't smell the cherries but I could glimpse a few of them and certainly taste them and I resolved right then and there to make another batch.
At that point I was called away from the kitchen by some urgent task or other and the next time I caught a glimpse of the second piece of ciabatta I had sliced for further evaluation (no self-sacrifice being to great for my Valentine), it had hugely shrunk in size and was actually walking towards me, firmly grasped in the right hand of said Valentine. Before I could react, he beamed at me: "I love this cake!"
Cake? Seriously? The Man has been living with me for more than for thirty years and eating my bread for almost as long and he still mistakes bread for cake? I replied sternly that not only what he was devouring wasn't a cake but that it was supposed to be his Valentine Day's breakfast surprise. He remarked that if it weren't a cake, it sure tasted like one and added judiciously that if it were a surprise, I shouldn't have left it lying around on the kitchen counter. He further offered that, if I let him proceed with his tasting,  he would gladly submit to a spot of amnesia and allow himself to be deliciously surprised on February 14th...
Since there is a (huge) lot to be said for regaling your Valentine with a treat you enjoy just as much as he does, I decided to forgive him his brief lapse of culinary judgment and proceed with the second test-bake. This time, I think I got the proportions right. The appearance is still rustic but nothing I can't live with. Of course I could always use more chocolate and more cherries. But then why not just make a cake? The Man wouldn't know the difference.

Formula

Yields four ciabattas, scaled raw at 500 g


For those of you who are using BreadStorm (including the free version), please click on this link to import the formula.  For more on BreadStorm, you may want to read this post.

Process

Note: This bread is made over 24 hours and requires a mixer equipped with a dough hook (such as a Kitchen Aid).

The night before the bake
  1. Mix the poolish, cover it loosely and let it ferment overnight (12 hours) at 73°F/23°C
  2. Roast the hazelnuts in a 350°F/177°C oven for about 20 minutes (I keep all nuts in the freezer which is probably why they need 20 minutes to turn brown. If yours are room temperature, they may not need more than 10 or 12 minutes) until they turn a rich brown color and let them cool on a kitchen towel. When they are cool to the touch,  rub them inside the kitchen towel until a good part of the skin has peeled off, then transfer them to a rimmed metal dish and break them roughly (I use the bottom of a heavy mug)
  3. Cut the butter in small pieces and reserve
  4. Scale the sugar and the honey
  5. If possible, keep above ingredients overnight at same temperature as the poolish but leave the eggs in the refrigerator
On baking day
Desired dough temperature (DDT): 73°F/23°C to 76°FF/24°C
(Depending on the room and the flour temperatures, you will need to use cooler or warmer water in the final dough to obtain the DDT at the end of the mixing process)
  1.  Half-an-hour before mixing time, take the eggs out of the refrigerator, scale them, beat them lightly and reserve
  2. Scale water 2 and bring to a boil
  3. Combine the dried cherries and chopped up hazelnuts, quick-soak them with the boiling water, drain and reserve the resulting tea (it will be brownish-looking and quite fragrant), letting it cool down to room temperature. This water remains your water 2 (I didn't top it off to make up for what the cherries and hazelnuts retained but you might have to if your flour is very thirsty)
  4. Scale the flour, yeast and salt. Whisk yeast and salt into the flour and reserve
  5. Place the poolish, the eggs and water 1 in the bowl of the mixer
  6. Add sugar and honey (if using 10% or less combined, it can be added at the beginning)
  7. Add the butter (if using 10% or less, it can be added at the beginning)
  8. Add the dry mix (flour + yeast + salt)
  9. Mix on first speed (on a spiral mixer) or speed 4 (on a Kitchen Aid) for 4 or 5 minutes
  10. Mix on second speed (on a spiral mixer) or speed 8 (on a Kitchen Aid) for 2-3 minutes
  11. Check gluten development. When gluten is 80% developed, add water 2 by increments on first speed (4 on Kitchen Aid) and mix for about 3 minutes
  12. Add the cherry-hazelnut mixture and the chocolate chips. Mix on first speed (4 on Kitchen Aid) until just incorporated
  13. Transfer into oiled dough tub, cover and let ferment at 73°F/23°C - 76°FF/24°C for 2 hours and 30 minutes
  14. Transfer the dough to a generously floured surface (see relevant video in All About Ciabatta: Notes from a Class), taking care not to let it fold over itself
  15. Divide and scale at 500 g (you should have four ciabattas (again please refer to the relevant video) (Note that in class, Didier scaled the breakfast ciabatta at 200 g and all the others at 400 g)
  16. Proof on floured linen, top down, for one hour
  17. Bake with steam on a baking stone in a 420°F - 216°C oven for 30 minutes (turning oven down to 400°F-204°C after 10 minutes, tenting with foil if over browning after 20 minutes and propping the oven door open (with a wooden spoon) for the last five minutes
  18. Cool on a rack
  19. Enjoy!
The crumb is rather darker than normal for an all-white flour ciabatta: that's because I used water 2 as a quick-soaking liquid for the cherries and hazelnuts. If you wanted a lighter crumb, you could throw out the soaking water but it would be a trade-off: you would lose a big part of the flavor.


Poolish in center, then clockwise: butter, honey, sugar and post-quick-soaking water 2


Don't you love the strands of gluten in the middle bubble?

Monday, February 8, 2010

Chocolate Tarts with Salted Caramel

I attended the Focus on Tarts workshop this weekend at the San Francisco Baking Institute and I loved it. I don't normally eat or even like sweets, so the tastings didn't transport me into taste-bud heaven as they occasionally do when the subject is bread, but we made some fantastic looking tarts and I am eager to try my hand at them again for family and friends, maybe starting with this lovely dessert for Valentine's Day. The tart is made with a "pâte sucrée" (sweet dough) shell in which 20% of the flour has been replaced by cocoa powder (according to Juliette Lelchuk, our most knowledgeable instructor, it is best to use Dutch-processed). Once baked, the shell is filled first with salted caramel, then with chocolate cream ("crémeux") and finally with a glaze. Juliette demonstrated the dry method of making caramel, which is faster than the wet one and somewhat less involved as you don't have to paint the side of the pan with water to keep the sugar from crystallizing. You do however have to be on standby and swirl the pot vigorously to help the melted and unmelted sugars combine more readily. The pot is pretty sticky when you get done but it cleans easily if you put it back on the stove and boil some water in it. The proportions are for 8 to 10 individual tarts and I leave it up to you to adjust them up or down for the number of tarts you actually want to make. Since many of the components will keep for a while refrigerated or frozen, my instinct would be to go for broke and plan for all 10 of them!
Pâte sucrée (Sweet dough)
Ingredients: 140 g all-purpose flour 75 g powdered sugar 35 g cocoa powder (preferably Dutch-processed) 35 g almond meal (optional, makes the dough more tender, can be toasted for a different flavor) 80 g butter, cold 1 g salt 60 g egg yolks, cold from the refrigerator Method:
  1. Sift the dry ingredients and place them in a food processor
  2. Cut the butter in small cubes and add to the dry ingredients, using brief pulses to mix until sandy
  3. Add the yolks and pulse again briefly just until the dough comes together
  4. Wrap the dough in plastic wrap after forming it into a ½-inch thick square and reserve in the refrigerator for a minimum of 4 hours but preferably overnight
  5. Roll and divide the dough (it needs to be cold) without going too thin, especially as it is going to blind baked (i.e. baked without a filling), keeping in mind that for each 6" tart, you will need a 8" disk of dough
  6. Line each mold or circle by first centering the dough over it, then lifting up the sides of the dough and dropping it in. Don't create tension or the dough will shrink. Go in and down all the way around, making sure that the edges and the bottom are at a sharp angle, never stretching. If you see a thin spot, patch it up with a bit of extra dough
  7. Refrigerate for at least 30 minutes to minimize shrinkage during baking
  8. Trim the edges, keeping in mind that the dough always shrink a little bit, which means you must work at an angle. Use a small spatula and make a series of small swiping motions (not sawing) with its very edge, working from the inside of the tart towards the outside. If the dough is too soft to be trimmed easily, put it in the freezer for a few minutes before proceeding
  9. Dock and bake at 350 F/177 C for 15-30 minutes (depending on size and thickness)
  10. Once the shells are baked and cooled down, put them in the fridge or freezer till you are ready to use them.
Chocolate Crémeux
Ingredients: 255 g heavy cream 25 g sugar 115 g 60-65% dark chocolate, chopped (do not use a chocolate with less than 60% cocoa content or a milk chocolate or the crémeux will have too soft of a set and don't go higher either or it will be too bitter) 60 g egg yolks Method:
  1. Bring cream to a boil (or at least a simmer) over medium heat
  2. Meanwhile whisk together the sugar and egg yolks without incorporating air
  3. Once the cream comes to a boil, pour 1/3 of it into the yolk mixture, whisking constantly. Whisk this mixture back into the pot.
  4. Reduce the heat to medium low and continue to cook, stirring constantly with a rubber spatula, to 180 F/82 C (don't go over that or you'll get scrambled eggs)
  5. Remove from the heat and immediately pour through a fine mesh strainer over the chocolate in a shallow bowl (just in case there are tiny bits of egg). Allow to stand for 1-2 minutes so the chocolate can fully soften (the bowl must rest on a trivet or a dry towel, especially if the counter is cold)
  6. Beginning in the center of the bowl, stir gently in one direction to create a stable, shiny emulsion
  7. Gradually stir in broader circles, to incorporate the cream at the edges of the bowl
  8. If using immediately, first cool (to 100-105 F/38 - 41 C) until slightly thickened . The crémeux can also be refrigerated (for up to 3 days) or frozen (for up to 2 months) and then gently rewarmed in the microwave or in a double boiler (you can also mix the whole thing with an immersion blender working from the center to the outer edges)
  9. Cover with saran wrap (directly on the cream) to avoid skin formation
Salted Caramel
Ingredients: 90 g sugar 45 g cream 30 g butter 3 g salt (I will use 2 g only on my next try as I found the caramel a bit too salty. If you try the recipe, let me know what you think) 2 g vanilla extract
Method: (use a medium-size heavy skillet or saucepan with a broad surface area so that the sugar can spread and cook evenly. The pan needs to be large enough because the cream can splatter when added to the sugar. Don't use a dark pan or you won't be able to judge the color of the caramel)
  1. Heat the saucepan empty until pretty warm
  2. Meanwhile heat cream, butter and salt in the microwave (or in a small saucepan)
  3. When the pot is hot (with stove on medium), add a tiny amount of sugar. It will melt very fast. Add another tiny amount and shake the pan (but do not stir or the sugar might clump).It is okay to get a small amount of color at this point but if the sugar burns, it means the pot was too hot and you'll need to start over. Conversely if it doesn't melt, let it rest a while longer before adding more
  4. Continue adding sugar in small quantities and swirling the pan around
  5. When all the sugar has melted and there are no lumps, reduce heat to low and stir (even pull the pan off the heat for a few seconds but continue stirring), using a heat-resistant spatula
  6. When the caramel is a dark reddish brown and starts to smoke (be careful because it will quickly become bitter if you wait longer), add a very small amount of the cream mixture (about 20%), stirring pretty vigorously and taking care to avoid steam burn.
  7. Gradually add the rest of the cream, stirring constantly (the ideal is for the cream to be quite hot when you start adding it, however you must take care not to heat it up so much that it starts steaming and evaporating)
  8. Once the caramel-cream mixture off the heat, add the vanilla
  9. Let cool on a trivet. It is going to thicken up a bit (it keeps a few weeks at room temperature. To avoid its becoming a bit grainy, you can add some corn syrup).
Chocolate glaze
Ingredients 225 g dark chocolate (60-65% cocoa), chopped 78 g butter 78 g corn syrup (to make the glaze shiny and softer)
  1. Gently melt the chocolate with the butter in the microwave or over a double boiler
  2. Stir in the corn syrup without incorporating air
  3. Use immediately or refrigerate and gently rewarm in the microwave or over a double boiler until fluid enough to pour (leftover glaze can be refrigerated for up to a month)
Assembling the tarts
  1. Use a microplane to smooth the upper edge of the tart shell, holding it parallel to the edge (never towards the center as the shell might break) (this step is optional and mostly intended to make a more professional looking dessert)
  2. Once the shells are ready, spray oil on an ice-cream scoop and put one tablespoon of caramel in each shell (a tip from the pro: if you want the shell to stay crisp longer, paint the inside with melted chocolate before pouring the caramel in)
  3. Tilt the shell to cover the bottom (if it doesn't spread easily, use a small spatula)
  4. Put the shells in the freezer for 5 minutes so that the caramel gets firm
  5. When the caramel is firm, pour the 100-105 F crémeux over the caramel, leaving approximately 1/4 to 1/8" of space at the top for the glaze, leveling it out quickly as it will set fast
  6. Chill or freeze until firmly set, at least 1 hour (the tart may be stored frozen at this point for up to 3 days)
  7. Once set, pour over enough warm chocolate glaze to cover the surface and quickly tilt the tart(s) for even coverage
  8. Chill or freeze until glaze is set, at least 1 hour
  9. Garnish the tart(s) as desired: edible gold leaf, fleur de sel, chocolate shavings, puffed rice covered with chocolate or other garnishes. The tarts can be stored in the refrigerator for up to 3 days, well wrapped.
 

Blog Designed by: Deanna @ Design Chicky