Home About Recipes Artisans Blog Notes Resources
Showing posts with label Liquid levain. Show all posts

Saturday, October 12, 2013

Fig-Anise 50% Whole-Wheat Bread

This Fig-Anise 50% Whole-Wheat bread was developed with the help of baker Martin Philip during the Creating Signature Breads workshop at the Kneading Conference West 2013.


Ingredients

By percentages

By weights (for four loaves)
Method

  1. Using mixer on first speed, combine flours, water and levain until incorporated (reserve about 10% of the water for later adjustments if needed) 
  2. Sprinkle salt and yeast on top
  3. Give a 15 to 30 minute rest (we didn't have time to do a longer autolyse at the Kneading Conference but a longer one would have been better)
  4. Turn mixer back on to incorporate yeast and salt
  5. Check hydration: dough should feel supple. Adjust as necessary
  6. Mix 2 min on second speed until gluten is fully developed
  7. Put in anise seeds, soaked grains (don't strain them) and figs
  8. Mix to combine on first speed: dough will fall apart first, then knit itself together
  9. DDT: 78°F
  10. Fermentation: 3 hours with one fold at 45 min
  11. Scale at 560 g
  12. Pre-shape as a loose boule (you have to be really gentle with this dough as it contains a lot of whole wheat and could get really dense if manipulated briskly)
  13. Shape as batards or tear-drops (to mimic shape of fig). If using a tear-drop shape, fold one end of the batard over itself as illustrated below
  14. Proof seam-up in floured bannetons or on floured couches for 45 min to one hour (use whole-wheat or whole-spelt flour)
  15. When loading on a peel, give each tear-drop loaf a slight curve to one side
  16. Bake for 32 to 35 min at 450° F, with steam
  17. Cool on a rack
  18. Enjoy!


For detailed information on various aspects of artisan bread baking, please visit King Arthur's YouTube channel: in this video in particular, from 6:38 min on, Martin Philip demonstrates how to shape a batard (in the first part of the video, master baker Jeffrey Hamelman shows how to shape both boules and baguettes).
For those of you who are using BreadStorm (including the free version), please click on this link to import the formula so that you can scale it up or down as desired.

Monday, August 26, 2013

Pear-Hazelnut Ciabatta

From looking at the above picture, you'd think this was just another ciabatta, right? Simply a different flavor combination than the one posted last week. And you'd be right of course, except that, as always, "l'essentiel est invisible pour les yeux" (what is essential remains invisible to the eyes, as the fox explains to the curious little boy in Le Petit Prince).
Indeed, beyond the listed ingredients, what got baked into this bread is friendship and love and the gratefulness that fills my heart for the support you have steadfastly afforded us since tragedy struck. Frankly I couldn't have made it so far so soon without your help. Each of your comments and emails has reached my heart and added a brick to the foundation on which healing may one day begin. Thank you!
The realization came to me as I was gathering what I needed for this bread: the stone-ground whole wheat flour with golden specks of bran came from a baker on Vancouver Island, the round and plump hazelnuts from a friend's farm in the Fraser Valley, the dried pears from a local friend who is rebuilding his home (as he will be without an oven for more than a year, he kindly brought me all -and I do mean all- his baking supplies). The levain was the distant progeny of the one sent to me last year by another friend on Orcas Island. The apron around my waist was a present from a friend in Maine.
I was  making the ciabatta for a friend from France who will be visiting next month: she lives above a bakery on a quiet street in a city near Paris. She has never eaten homemade bread in her life. 
As I stood thinking of her, weighing each ingredient in turn, I remembered the kindness and passion of the baker who had shared it with me and I suddenly realized that beyond the eagerly awaited guest and my baking friends, all of you were in the kitchen with me as well, still present eight and a half months later, still caring, still remembering Noah and still striving not only to show support but also to prevent further acts of random violence like the one which had devastated the Newtown families. I could never thank you enough. This ciabatta is dedicated to you.
It was inspired by the cool front which has hung over our valley for the past few days: mist rising from the river at dawn, odd leaves turning bright red, apples and pears hanging heavier in the gardens that line the trail, humming birds dancing at the feeders as if already gearing up for the long trip south. 
Cliff Mass, our beloved local meteorologist, says summer isn't over yet and I believe him. Still I have seen the writing on the landscape and distant memories of fall have come drifting back. The yellowing fruit against the old stonewall in my grandfather's orchard, the ripe hazelnuts falling off their husks under the thicket by the chicken coop, we kids filling our pockets before heading out for a day's adventures, the breath of a faraway and long-ago garden brought back by the smell of damp grass as I bend to pick up the paper from my Northwest driveway every morning. Threads of life woven together. Past and present. Love and loss. Being part of a larger whole, of a living tapestry. Separate, yet connected.
A comforting thought to go with the first bread of fall.


Pear-Hazelnut Ciabatta
The method is the same as the one I described in my previous post with minor changes.
  • The oatmeal I used was a leftover from breakfast the day before, it hadn't been cooked with baking in mind and was therefore a bit runnier than I would have liked. Had I made oatmeal specifically for this ciabatta, I would have reduced by half the amount of cooking water. As it is, I can't tell you how much water I used because I never measured it. I adjusted for the wet oatmeal by reducing the amount of water added to the dough in the final mix.
  • I soaked the pears only briefly (three minutes only and in boiling water) and used the soaking water (which smelled delicious) in the dough.
  • The hazelnuts I roasted and peeled, then ground coarsely in a flat bowl with the thich bottom of a small bottle of balsamic vinegar. The grinding was no hassle. But the peeling was rough: I had never truly appreciated before how convenient it was to have two hands when rubbing hazelnuts together. 
  • I didn't soak the hazelnuts but right before incorporating them into the dough, I gently hand-mixed them with the pears so that some of the wetness would rub onto them and they wouldn't be as likely to suck up water from the fermenting dough. Next time I might try and soak them briefly as they may have dried out the dough a bit.

Ingredients (for 3 ciabattas)
  • 450 g unbleached all-purpose flour
  • 150 g whole-wheat flour
  • 150 g wholegrain steel-cut oats, cooked, barely salted, unsweetened, at room temperature
  • Water 1: 300 g
  • Water 2: 75 g
  • 150 g dried pears, roughly chopped, soaked for three minutes in boiling water (unless they were super dry and hard, I wouldn't soak them any longer for fear of their turning to mush)
  • 80 g hazelnuts, roasted, peeled and coarsely ground
  • 150 g ripe liquid levain (100% hydration)
  • 150 g ripe poolish (75 g flour + 75 g water + a pinch of instant yeast)
  • 18 g fine sea salt
Method (the bread is made over two days)
The night before
  1. Feed the levain
  2. Prepare the poolish
  3. Roast, peel and chop the hazelnuts
Early on the day of the bake (at least two hours before mixing begins)
  • Roughly chop the pears and soak them to cover for three minutes in boiling water
  • Drain, saving the water
Mixing 
  1. Pour water 1 (including pear-soaking water) in bowl of mixer
  2. Add all-purpose flour, whole-wheat flour, oatmeal, levain and poolish
  3. Mix on low speed until incorporated
  4. Add the salt
  5. Mix on low speed until gluten is developed
  6. Add water 2 (slowly and in stages) and crank up speed one notch
  7. Mix briefly (just until the water is incorporated)
  8. Bring speed back down to low and add pears and hazelnuts
  9. Mix until incorporated
  10. Set dough to rise in oiled and covered pan
  • Dough temperature was 80°F/26°C and room temperature 72°F/22°C
  • I gave the dough two folds at 50 minute-intervals
  • Fermentation time was 4 hours, followed by 45-minutes proofing time (I am not sure why the dough fermented faster than last week. Maybe the sugar in the pears sped up the process?)
Dividing and Baking


As described for the teff ciabatta
  • Except that I set the oven to 410°F/210°C for the first 15 minutes
  • And lowered it to 400°F/204°C afterwards to prevent the crust from darkening too much (again because of the sugar in the pears)
  • I also tented the ciabattas with aluminum foil after the first 15 minutes
  • I used steam at the beginning and kept the oven door ajar for the last five minutes

Sunday, August 18, 2013

One-handed Ciabatta

As you may have noticed if you have kept up with this blog for the past few months, it has taken me a long time to go back to baking after Noah died. I am not sure why really. The only explanation I can find is that I needed a little flame to keep going and the little flame was gone.
In early July, just as I was finally thinking of baking again (I had started a new levain, it was bubbling actively and I was planning to put it to the test), I broke my left wrist.
The levain went into the fridge and back we went to buying our bread (fortunately there are several excellent bakeries in Seattle) or eating the beautiful and tasty loaves that baker friends most kindly shared with us.
All these months I had never really missed baking but this time around I felt really frustrated. However there was not much I could do about it with a broken wrist, so at first I did nothing.
Then Sunday a week ago my hand turned a bit dusky and a bluish tinge started creeping down to my fingers. According to the discharge sheet we had been given, this was reason for concern. I called the hospital hotline. We were told to go to the emergency room immediately.
To make a long story short, the physician on guard cut my cast open to make it less tight and the following day, I got a brand-new one, a bit shorter at both ends than the previous one, which made it easier for me to fold my arm and move my fingers.
Now I know the surgeon had said yes to typing again and no to bread-mixing and DSLR-photography (see this post). But as it turned out, typing is actually not that comfortable (I can do it but it makes for swollen fingers) while a few other things come more easily: for instance, pinching and lifting small things between my fingers (the thumb still not opposable because the cast holds it back) or putting a tiny bit of weight on my arm. Plus when I spoke to the physical therapist who prescribed daily exercises, he basically told me to try and go back to what I loved without overdoing anything and to see how it went. Needless to say, that was music to my ears...
So a few days ago, I sat my baking self down for some hard thinking:
  • First the levain needed to come out of the fridge so that I could see what kind of a mood it was in. Fed once a day for a couple of days, it soon started bubbling again. I knew I would have no problem there
  • Then I looked at my brand-new cast. Hand-mixing was out of the question: not only did I have to keep the cast clean and dry but even if I managed to hold the bowl in the curve of my left arm, I couldn't overtax my right wrist (I have had problems with it in the past). Fortunately I have a Kitchen-Aid mixer. I resolved to use it
  • Shaping was next: there was no way I could shape a boule or a batard. But I could bake in a pan or I could bake a bread that required no shaping, such as a ciabatta. With Didier Rosada's All about ciabatta class fresh in my memory, I didn't want to bake in a pan. It had to be a ciabatta
  • Ciabattas have to proof right side down on a floured couche and need to be flipped floured side up for baking. The rod the surgeon put inside my arm goes from my elbow almost all the way up my hand to the beginning of my fingers. There is no way I can flip anything, not even a piece of paper. I would have to settle for proofing on parchment paper and baking wrong side up. The rod is coming out towards the end of September, so it was a temporary setback and hopefully not a major one. I decided to ignore it
  • Didier had shared several marvelous formulas with us but when I do make one of them, I want to report on it on this blog, including tips, photos, videos, etc. With typing setting my hand on fire (I am writing this in bits and pieces), I knew the longer post would have to wait. I had to devise my own ciabatta
  • Still of course I remembered what Didier said, how, in his own bakery, he likes to combine levain and poolish to add complexity to the dough and how much fun it was to just experiment. Taking stock of what I had at hand, I decided to go for teff, to use some whole wheat flour as well and to complement the flavor and texture with roasted sunflower seeds. I also decided to add water in two steps as he so brilliantly demonstrated
  • I knew that mixing and baking the ciabatta wouldn't be fun if I had to ask for help. So I made up the one and only rule: I had to manage by myself from A to Z, including handling the oven and cleaning up (even if I had to stick everything in the dishwasher, which I did). Hence the title of this post: one-handed ciabatta
It went way more smoothly that I thought it would. Cast in the supporting role (pun intended!), my left arm rose to the occasion. Believe it or not, the hardest part was setting the camera on the tripod for the post-baking shots. The one-handed smartphone shots were no problem.
The fragrance that wafted out of the oven during the baking was pure bliss and brought back happy memories.
But it wasn't until we cut open the first ciabatta (the proportions given below yield three) and I saw the tan color of the crumb that I knew why I had picked teff out of all the grains I stock in the fridge: last summer, when Noah, his mom and his sisters came to visit at our little camp by the river, I made several loaves of teff bread with flour a former colleague had brought back from Ethiopia. Noah liked it so much that he ate almost a full loaf by himself, without butter or jam or any other kind of topping. His bright and eager expression, the sheer joy on his face as he chewed will stay with me forever.
His memory had brought me back full-circle. A circle of love. And the little flame had been rekindled.
Ingredients (for 3 ciabattas)
  • 450 g unbleached all-purpose flour
  • 150 g whole-wheat flour
  • 150 g teff mash (75g teff flour + 75g water. See this recipe for mash explanation and how-to)
  • Water 1: 350 g
  • Water 2: 100 g
  • 80 g sunflower seeds, toasted and briefly soaked (water from that soaking is part of water 1)
  • 150 g ripe liquid levain (100% hydration)
  • 150 g ripe poolish (75 g flour + 75 g water + a pinch of instant yeast)
  • 18 g fine sea salt


Method (the ciabatta is made over two days)

The night before
  1. Feed the levain
  2. Prepare the poolish
  3. Briefly dry-roast the sunflower seeds in a small frying pan
Early on the day of the bake (at least two hours before mixing begins)

Teff mash
  1. Pour the boiling water over the teff flour and mix well
  2. Make sure the teff flour is completely hydrated, adding a bit more water as needed
  3. Set aside until mash comes to room temperature
Sunflower seeds soaker
  1. Add a bit of boiling water to the roasted seeds (just enough to cover)
  2. Let soak 20 minutes or so
  3. Drain the seeds and save the water


Mixing
  1. Pour water 1 (including sunflower seeds soaking water) in bowl of mixer
  2. Add all-purpose flour, whole-wheat flour, teff mash, levain and poolish
  3. Mix on low speed until incorporated
  4. Add the salt
  5. Mix on low speed until gluten is developed
  6. Add half of water 2 and crank up speed one notch
  7. Slowly add the other half of water 2
  8. Mix briefly (just until the water is incorporated)
  9. Bring speed back down to low and add the sunflower seeds
  10. Mix until incorporated
  11. Set dough to rise in oiled and covered pan
- Dough temperature was 79°F/26°C at the end of the mixing.
- Fermentation lasted six hours at 72°F/22°C, with two folds one hour apart.
- Since my broken wrist made it impossible to fold the usual way (north over south, then west over east, and flip over), I did it one-handed inside the pan, simply by picking up the edge of the dough and bringing it towards the center, making sure to go all around.
- I should point out that I chose the wrong shape of pan for fermenting the dough. Since I was making an elongated bread I should have chosen a rectangular pan instead of a square one. I will next time.
Dividing and baking
  1. When dough has finished rising (when you palpate it with the tip of a finger, the indentation remains for a little while), dust the top with flour and invert the container on a floured counter top
  2. Gently elongate the dough into a rectangle
  3. Divide in three length-wise (there was no way I could weigh the pieces so I just eyeballed them)
  4. Using the dough cutter as a lift, transfer each piece of dough to a parchment-paper covered half-sheet pan and proof, covered, for 45 minutes to 1 hour depending on room temperature
  5. Meawhile pre-heat oven to 420°F/215°C
  6. Slide proofed ciabattas into the oven and bake (with steam for the first five minutes) for 20 minutes before turning the oven down to 400°F/204°C
  7. Continue baking for another 10 minutes (propping the door of the oven ajar with a wooden spoon for the last 5 minutes)
  8. Cool on a rack
  9. Enjoy!

Sunday, November 4, 2012

Autumn Focaccia

Sometimes a girl just wants to have fun! After several weeks of steaming, pureeing, simmering, gratin-ing, sautéing, freezing and preserving my favorite squash - the orange kabocha, aka red kuri or Hokkaido squash - (of which we had a most welcome glut this year thanks to our CSA), I decided to do something I had never done or seen done before: make squash flour and bake with it!
I chose a beautiful bright one...
...washed it, cut it in two, scooped out the seeds, steamed one half for dinner and grated the other half raw, unpeeled, in the food processor. After drying out the grated squash for a few hours in the dehydrator, I had colorful strands of crisp squash (actually quite tasty on their own) which I ground into flour. Half the squash above yielded about 300 g of "flour".
Now what to do with it? I toyed for a few days with the idea of baking a triple pumpkin bread (pumpkin flour, pumpkin purée and pumpkin seeds) but it might have been led to tastebud overload. Besides I wanted to see how the color of the flour would translate into the crumb on its own.
So I made a simple focaccia with two preferments: a poolish and some liquid levain. Because I love the rustic taste of rye, I put a bit of freshly milled wholegrain rye in the poolish. I only used 10% of kabocha flour in proportion to the total dough flour and while it smelled exquisite when mixing and fermenting/proofing, the flavor had all but disappeared in the one focaccia we tasted (the other one went straight to the freezer). The one we ate had been sprinkled with thinly sliced leek white however. If there were such things as arm-wrestling matches between ingredients, leek would lick squash in a heartbeat! Wrong choice of topping, MC!
Next time I'll skip the leek and increase the percentage of squash flour to 15 or 20%. Since it has no gluten, it doesn't do much for the crumb but it doesn't seem to hamper its development either and that's basically what I had been wondering about...
Now some of you who may ask why I used two preferments (every time I do I get some mail or comment about that). The only reason really is that my liquid levain was bubbling on the counter next to the mixing bowl and it would have been a waste not to incorporate some of it. No huge brainstorm. Just an opportunity to make use of surplus levain.
Having never baked with pumpkin flour before and not knowing how it would behave, I had originally opted for a poolish instead of a biga (the traditional Italian pre-ferment for a focaccia according to Carol Field): if it helped itself to a large part of the water in the dough, I would end up with a brick. To minimize the risk, I went for a poolish which is equal parts flour and water.
Next time though, I may try and skip the poolish entirelyBreads made with natural starter have a much longer shelf life. Since we eat a lot of bread and usually have two or three kinds out at any given time to be enjoyed at different meals, my preference goes to breads which stay fresh for more than twenty-four hours.
Alternatively I may try and find out how William Leaman of Bakery Nouveau in West Seattle does it. His baguettes are fermented with a mix of poolish and levain and they do stay fresh! I kept half of one on my kitchen counter for almost two days (in a plastic bag) and it wasn't a bit stale or dried out. It has to be more than just his magic touch. If I ever learn how he does it, I'll report back. Meanwhile I'll probably stick to levain (but of course it won't be a true focaccia, will it?)
I had fun with the olive oil I used to "paint" the focaccie: seeking flavors that would enhance and complement the squash without overpowering it (no wrestling matches allowed), I picked rosemary and sage from the garden and used some of the chile I had bought fresh last fall from a Thai vendor at our farmers' market, cut up and dehydrated. The oil infused while the dough fermented...


Ingredients (for two focaccie)

For the poolish
  • 250 g all-purpose flour, unbleached
  • 50 g whole grain rye flour
  • pinch of instant yeast
For the final dough
  • 700 g all-purpose flour, unbleached
  • 100 g kabocha "flour" (see above description of the pumpkin-flour-making process)
  • all of the poolish
  • 100 g mature white levain at 100% hydration
  • 480 g water (you may need more or less according to the dryness of the weather, your flour, etc.)
  • 22 g fine sea salt
For the olive oil "paint"
  • Your favorite extra-virgin olive oil (I like the fruitiness of Trader Joe's Premium cold pressed EVOO, the one that comes with a dispensing cap attached to the neck of the bottle. I have searched high and low for olive oil over the years, seeking one that would be both tasty and reasonably priced. I tried many different supermarket brands, including all (and I mean all) of the ones sold at TJ's and Costco. Tired of being stuck with less than satisfactory oils for weeks on end - it isn't as if we could sample before buying - I now always reach for this one and it has never disappointed. I don't have any shares in TJ's or any incentive to promote any of their products. I just want them to continue offering the product as I don't feel like going on an EVOO quest ever again!)
  • A mix of fresh or dry rosemary or sage
  • Little pieces of dried chile (in a pinch you might use a tiny bit (think half-a-teaspoon) of red pepper flakes but it might stick to the top of the bread and impart too much heat. The beauty of the little pieces of chile is that you can pick them out after baking if you just want the taste, not the spiciness)
For the topping (optional)
  • Thinly sliced leek (white part only) or onion
  • A pinch of Maldon salt
  • Grated cheese (if desired)
Method:  (because of the pre-ferments, this bread is made over two days)

The evening before mixing
  1. Prepare the poolish by mixing the flours and the water and adding a pinch of instant yeast
  2. Cover and leave to ferment at room temperature
  3. Feed you levain as you normally do
The day of the bake
  1. Mix the flours, the water, the salt, and the two pre-ferments (I started mixing by hand in a bowl but my wrists protested so I switched to my Kitchen-Aid mixer with the hook, on first speed)
  2. Mix until you start seeing some gluten development (check the gluten window and stop mixing as soon as you get the beginning of one. It should take less than five minutes in the mixer)
  3. The dough should  have medium soft consistency. Adjust hydration as needed
  4. Transfer the dough to an oiled container, folding the dough once after thirty minutes if you think it needs it
  5. Leave it to ferment for as long as it takes for the dough to more than double and stop bouncing back quickly when palpated with a finger (how long it takes is directly linked to dough and room temperatures. In my case, dough temperature was 71°F/22°C which was a bit on the low side and room temp was 65°F/18°C. In my countertop proofer, set at 75°F/24°C, it took the dough close to seven hours to finish fermenting)
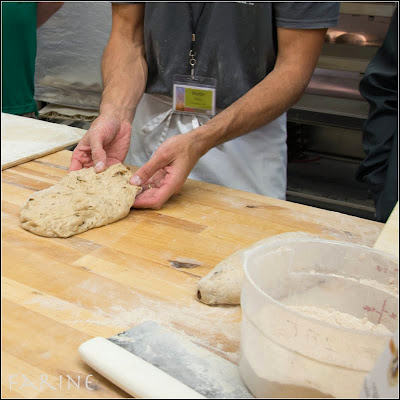
  6. Transfer the dough to a floured countertop and divide it in two
  7. Stretch each of the two pieces of dough onto a semolina-sprinkled-parchment-paper-lined half-sheet and set to proof inside a large plastic bag (make sure to blow into the bag and close it securely so that the plastic doesn't touch the bread) for about an hour and a half (or until the dough stops bouncing back immediately when palpated with a finger)
  8. When the focaccie are done proofing, dimple them all over gently with the tips of your fingers and use a wide pastry brush to "paint" them with the strained olive oil (leftover oil, if any, can be used to sauté potatoes or dress a salad)
  9. Sprinkle with the desired toppings (I used some of the oil-soaked rosemary on one and leek white on the other, bits of chile and some Maldon salt on both)
  10. Bake with steam on a baking stone in a pre-heated 400°F/204°C oven for about 25 minutes
  11. Cool on a rack and remove the toppings that you wouldn't want to eat, such as rosemary leaves or pieces of roasted chile
  12. Enjoy!

The Autumn Focaccia is going to Susan for this week's issue of Yeastspotting.
 

Blog Designed by: Deanna @ Design Chicky